WiFi Pineapple Mark VII - My Introduction to WiFi Pentesting
Right now, I am diving deep into the world of WiFi pentesting, and for that, I got myself the Hak5 Pineapple Mark VII Tactical Kit.
I really wanted to gain practical experience in how to analyze WiFi networks, make clients visible, and of course, capture handshakes.
To be honest, the beginning wasn’t as easy as some videos make it seem.
The first steps were a bit tricky: flashing the firmware, establishing a connection, routing the network properly, but that’s exactly what makes it interesting.
You learn, step by step, what is actually happening in the background.
Setup and Initial Tests
First, I installed the Tactical Kit with the additional 5 GHz module because I definitely wanted to see modern devices that only operate on 5 GHz. Without this module, the possibilities would have been quite limited.
Then I started to take a closer look at how the Pineapple scans networks.
At first, I assumed it would automatically detect all devices, but it’s not that simple.
Many devices, especially smartphones or smart home gadgets, behave quite passively on the network. You only see them once they "wake up" or become active.
Before getting too deep into scanning, I also explored the module library inside the Pineapple interface.
This step was essential because, by default, the Pineapple works as a solid foundation, but the real power comes with the additional tools you can install.
Modules Installed
I made sure to download several key modules right away:
- Recon Tools: To extend the scanning capabilities beyond the basics.
- Evil Portal: For building captive portals later on, perfect for future phishing or credential-harvesting scenarios.
- Nmap: For advanced network mapping.
- MAC Info: To resolve MAC addresses and learn more about the devices in range.
- HTTP Peek: To analyze HTTP traffic directly.
- Hcxdumptool: For capturing handshakes and wireless frames in depth.
- Locate: To perform basic geolocation lookups.
- And several others to ensure the environment was fully prepared for testing.
With these modules installed, the Pineapple really started to feel like a fully equipped toolbox.
I already had a clear picture of how I wanted to continue.
Scanning Setup
I configured the scan for both bands (2.4 GHz + 5 GHz) and set the mode to continuous, so the Pineapple would monitor the environment over a longer period.
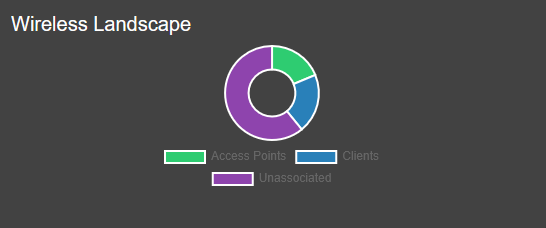
That really helped: gradually, more and more devices started to show up, including several IoT devices from Tuya, a mesh network, and additional access points.
First Observations
What I found especially interesting was that even if some clients weren’t directly visible in the scan, Deauth still worked.
As a test, I kicked my phone out of a guest WiFi network, and it worked perfectly, even though the device wasn’t showing up in the scan beforehand.
This shows that the Pineapple also works effectively beneath the surface.
Another interesting aspect was observing the behavior of IoT devices.
Many of them only send packets occasionally, which explains why they don’t immediately appear in active scans.
With longer scanning durations and a combination of passive monitoring, these devices became visible over time.
Next Steps & Goals
My next goals were then clear:
- Improve visibility.
- Capture handshakes.
- Automate the whole process as much as possible.
With the modules already in place, I also wanted to eventually test Evil Portal properly, by deploying a captive portal once clients connect to my rogue access point.
This will be an interesting addition to the overall workflow later on.
Automation with Campaigns
That’s why I started a campaign afterward, to automatically collect data on networks and clients over a longer period of time.
One thing I noticed: while a campaign is running, manual scanning is disabled.
I didn’t know that beforehand, but it makes sense since the Pineapple would otherwise be working double.
The campaign is currently running for 30 minutes, and I’m curious to see what it will log.
Afterward, I will go through the reports and check whether I’ve discovered new clients and hopefully captured additional handshakes.
I am particularly interested to see if the combination of continuous scanning, campaign automation, and the modules I installed will provide a broader picture of the wireless environment and potentially more valuable data.
Working with Handshakes
During the scan and campaign run, I enabled Auto-Capture Handshakes, which worked as expected.
However, since I scanned all available networks at once, I need to go through the handshake logs carefully to identify which handshakes belong to my own network.
My plan moving forward:
- Filter the handshakes and correlate them with the known MAC addresses of my network.
- Focus on one specific network for the next round.
- Deauth all connected devices from that specific network to increase the chances of completing a full handshake capture.
- Continue analyzing the captured handshake parts to understand the structure and completeness.
SSH Access and Power Management
On the side, I also explored how to manage the Pineapple via SSH for more control over file access and shutdown procedures.
I tried the usual shutdown commands, but they didn’t work as expected.
Eventually, I learned that the Pineapple doesn’t support typical shutdown commands like sudo shutdown now.
Instead, you can safely shut it down via the web interface or simply unplug the device (which is safe given its read-only operating mode).
Alternatively, through SSH, you can use:
poweroff
This command safely powers down the device.
Interim Conclusion
Even though things were a bit tricky at the beginning, the learning curve is very steep.
You really notice how much you learn through hands-on work.
It feels great to understand why some devices are visible and others are not, why handshakes don’t always succeed right away, and how combining scans, deauth attacks, and campaigns leads to better results.
Having the right modules in place definitely added more depth to my tests, and it’s clear that the Pineapple is much more powerful when properly extended.
I’m very excited to see how the next steps will unfold.
The next milestone will definitely be to analyze the campaign reports, identify my own handshakes, and take another look at them to see what can be done.
Step by step, the environment becomes clearer, and with every action, the toolbox grows.
Shortly after completing the first capture sessions, I began preparing for the next major stage of this workflow: cracking the captured handshakes.
I exported the full .22000 hash files from the Pineapple, which were complete and included all necessary handshake frames.
This provided the ideal foundation for password recovery.
Cracking Environment Preparation
For the cracking process, I set up my Kali Linux machine with Hashcat.
After confirming that Hashcat was properly installed, I tested it with smaller wordlists first to validate the setup.
As expected, wordlists like probable-v2-wpa-top4800.txt were exhausted within seconds, without success.
This outcome was predictable and proved an important point: many public wordlists are simply too small or too generic for real-world WPA2 networks, especially those using random router-generated keys.
Refining Wordlist Strategy
To address this, I researched better wordlist options, focusing on practical router defaults and password patterns.
My selection included:
- wpa-sec.stanev.org cracked.txt, a database of real-world WPA passwords.
- Fritzbox WPA default key lists, targeting common router factory configurations.
- SecLists collection, offering a variety of relevant lists.
- Weakpass.com collections, covering billions of passwords.
In parallel, I began generating my own wordlists using crunch.
This approach allowed me to precisely control the patterns and lengths of the passwords, making them more suited for router defaults and potential user-generated keys.
For instance, I created an 8-character Fritzbox-style list:
crunch 8 8 -t @@%%@@%% -o fritzbox-default.txt
And for longer, more complex patterns:
crunch 12 12 -f /usr/share/crunch/charset.lst mixalpha-numeric -o wifi-strong.txt
Launching the Attack
With better wordlists in place, I launched Hashcat using the following command:
hashcat -m 22000 -a 0 --status --status-timer=30 --force --optimized-kernel-enable /path/to/handshake.22000 /path/to/wordlist.txt
This setup allowed real-time monitoring and ensured that performance was fully optimized.
One clear observation during this process: Hashcat returning "Exhausted" simply means the wordlist has been fully processed, it does not indicate any technical failure.
This emphasized the importance of using larger, high-quality lists or focusing on mask attacks tailored to known password structures.
Planning the Next Steps
To improve efficiency, I plan to automate the handling of multiple wordlists and streamline the cracking process even further.
I will also experiment with mask attacks that can accurately target structured passwords like those typically used by default router configurations.
In addition, I intend to explore private compilations from less public sources.
It is well understood that within certain underground forums, specialized wordlists circulate that include region-specific router defaults, custom-crafted lists, or combinations of real-world leaks.
While accessing these is purely theoretical at this point, it remains an interesting future direction to further strengthen my cracking strategies and deepen my understanding of real-world password patterns.
Conclusion
This entire process has already proven to be extremely valuable.
From configuring the Pineapple and running automated campaigns, to capturing full WPA2 handshakes and refining my cracking workflow, I am building a complete and effective methodology.
The focus going forward will be on automation, efficiency, and expanding the depth of my wordlists.
With each new step, the environment becomes clearer, the tools sharper, and the chances of success higher.
This is just the beginning - and I am looking forward to where this project will lead next.